
Publish or schedule an article
Choose a blog post's publication state and set a date and time for a scheduled publication.
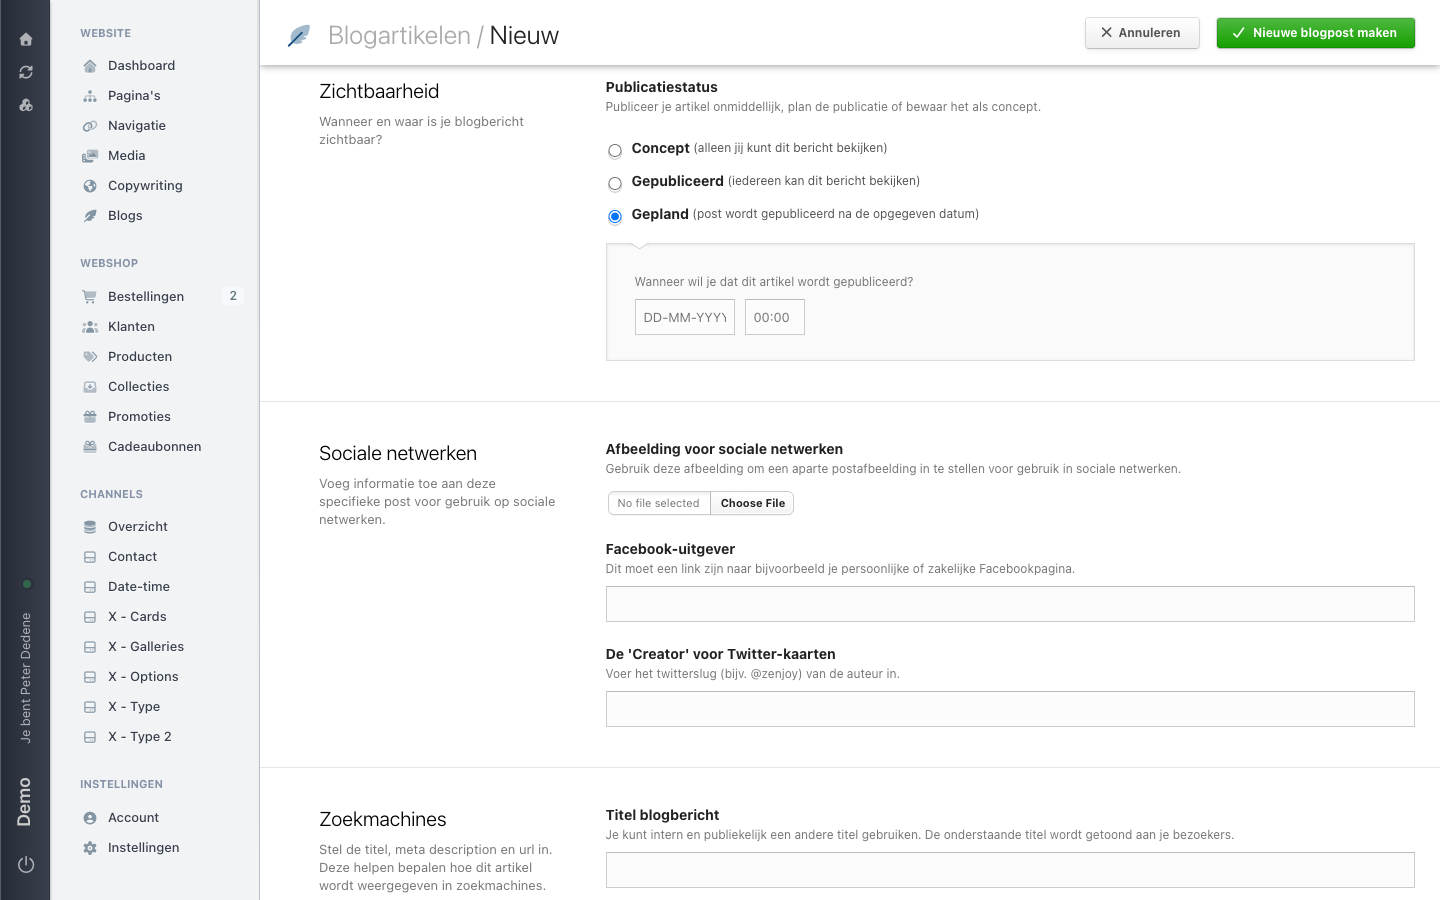
Whether a blog post is visible comes down to one setting: the publication state, in the Visibility (Zichtbaarheid) section of the article form.
 View full size
The three choices
Draft (Concept) means only you can view the post. Every new article starts here.
Published (Gepubliceerd) means anyone can view the post, as soon as you save.
Scheduled (Gepland) publishes the post after a date and time you set.
Schedule a publication
- Open the article and scroll to Visibility.
- Choose Scheduled. A panel opens asking when you want the article published.
- Fill in the date as
DD-MM-YYYYand the time as00:00. - Save the article.
If you fill in only a date and leave the time empty, check the field again before saving. The two fields together make up the publication moment.
What the article list shows
The overview of all articles has a visibility column. Its values are in English even in a Dutch administration: DRAFT for a draft and PUBLISHED for a published article.
Publishing is a decision, not an editing step
Moving from draft to published makes the article public immediately. Finish the content review first, and agree with whoever is responsible for the site when the post may go online. If you are unsure about the date or the site, leave the state on draft.
If you cannot see the choices
Which actions you get depends on your access and on the selected site. Check both first. If the Visibility section is still missing, ask an administrator for access to blog management.