
Add custom product fields
Use the data model to add fields that Nimbu does not put on a product by default.
Nimbu gives every product a name, a price, images, and stock. What comes after that differs per shop. A coffee roaster wants roast level and origin, a clothing shop wants fabric composition. That is what the data model is for.
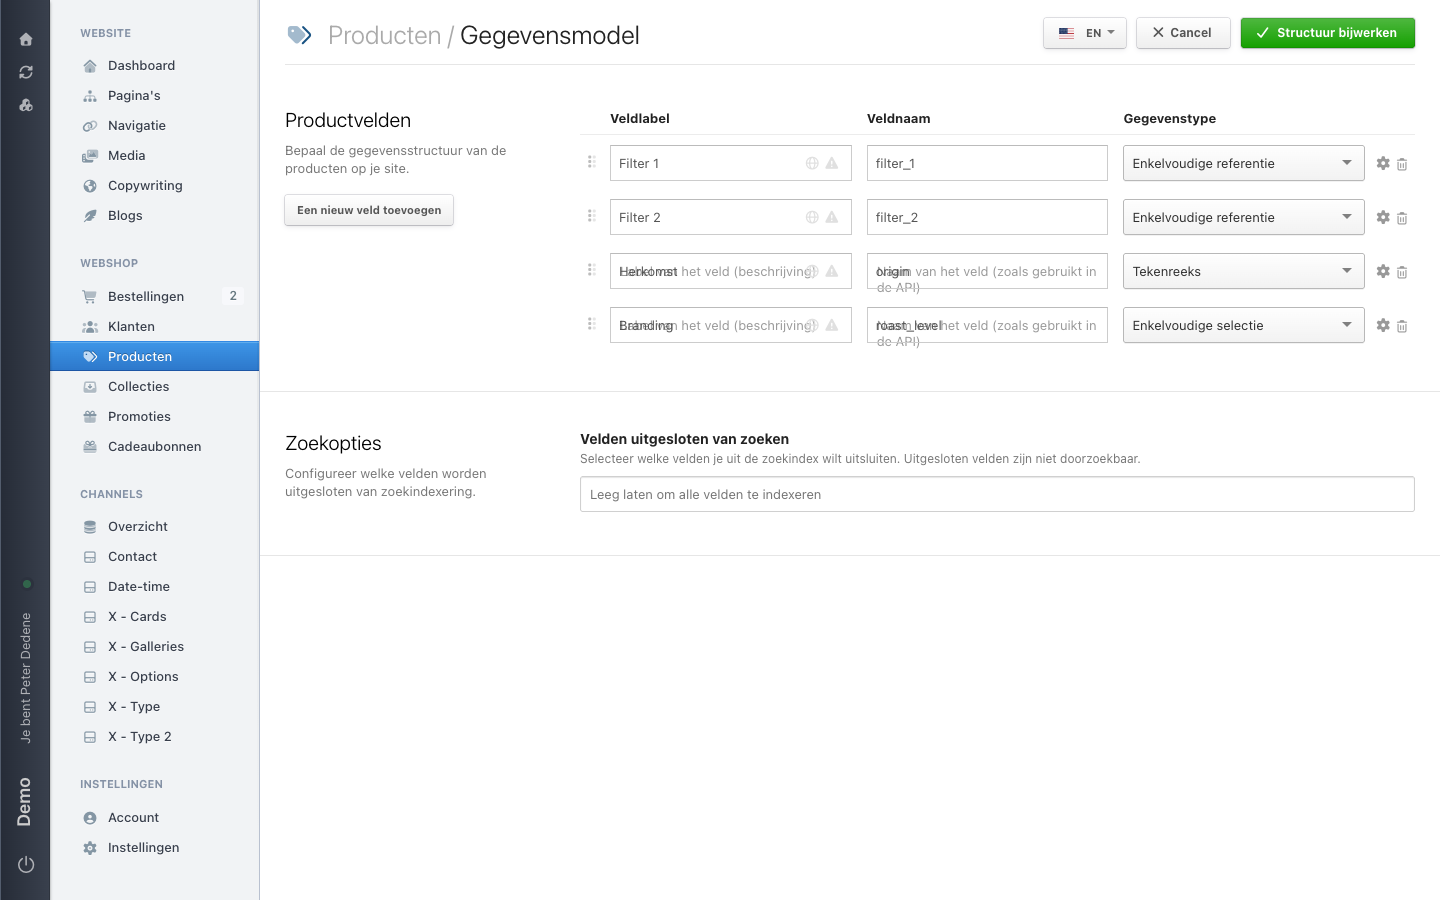
You find it through Products → Data model. On a Dutch admin the heading reads Producten / Gegevensmodel, with the Productvelden (product fields) section below it.
 View full size
Add a field
- Open Products → Data model.
- Choose Een nieuw veld toevoegen (add a new field).
- Fill in the field label. That is the name editors see on the product form.
- Fill in the field name. Your theme or an integration uses that one.
- Choose the data type.
- Choose Structuur bijwerken (update structure) at the top right.
Get the field name right the first time. Changing it later breaks every piece of theme or integration that already refers to it. The label you can change whenever you like.
The kinds of field
You can choose from these types:
| Type | Use it for |
|---|---|
string | Short text on one line |
text | Longer text over several lines |
email | An email address |
integer | A whole number |
float | A number with decimals |
boolean | Yes or no |
file | One file, such as a manual |
date, time, date_time | A date, a time, or both |
select | One choice from a list |
multi_select | Several choices from a list |
calculated | A value derived from other fields |
belongs_to | A reference to one other item |
belongs_to_many | A reference to several items |
customer | A reference to a customer |
gallery | A set of images |
geo | A location |
json | Structured data for developers |
The type picker shows these under Dutch names. string appears as Tekenreeks, select appears as Enkelvoudige selectie.
Torn between string and select? Pick select as soon as the answers fit on a short list. It saves you cleaning up spelling variants later.
The extra settings
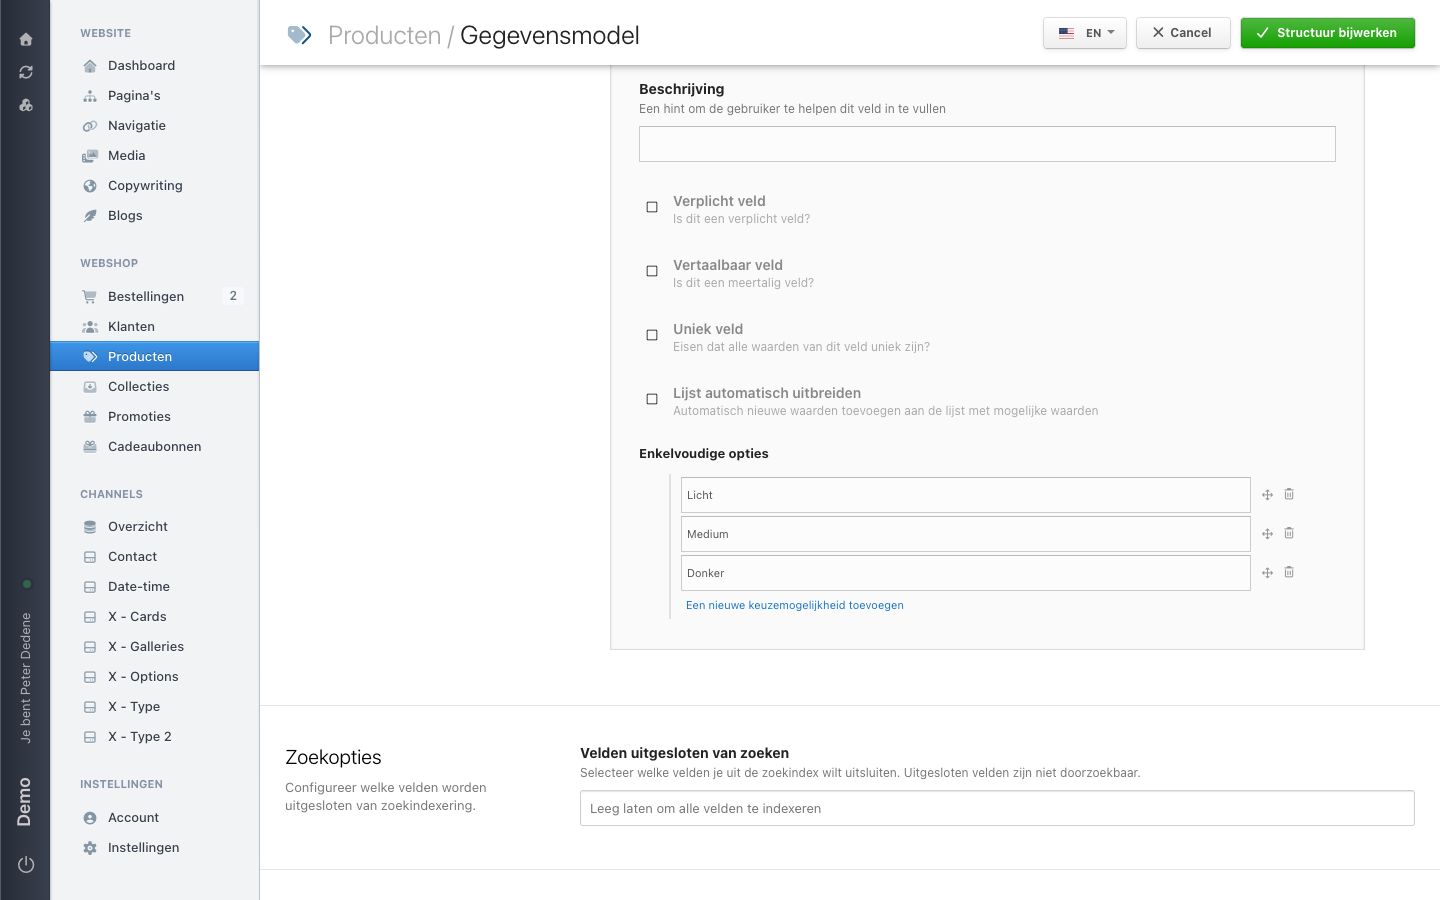
Behind the field-settings toggle sits the rest of the field: a Beschrijving (description) that becomes a hint next to the field, and checkboxes for required, translatable, and unique. Depending on the type, more settings appear.
The language button sits at the top right. Switch language there to translate your field labels.
Options on a select field
You can only add the options of a select field after saving the field once. So the order is:
- Create the field with type
selectand choose Structuur bijwerken. - Open the field settings on that field.
- Under the options heading, choose Een nieuwe keuzemogelijkheid toevoegen (add a new option) and fill in the option name.
- Choose Structuur bijwerken again.
 View full size
If you are adding several options, save in between. When we added three in one go, one of them did not make it.
Where your fields end up
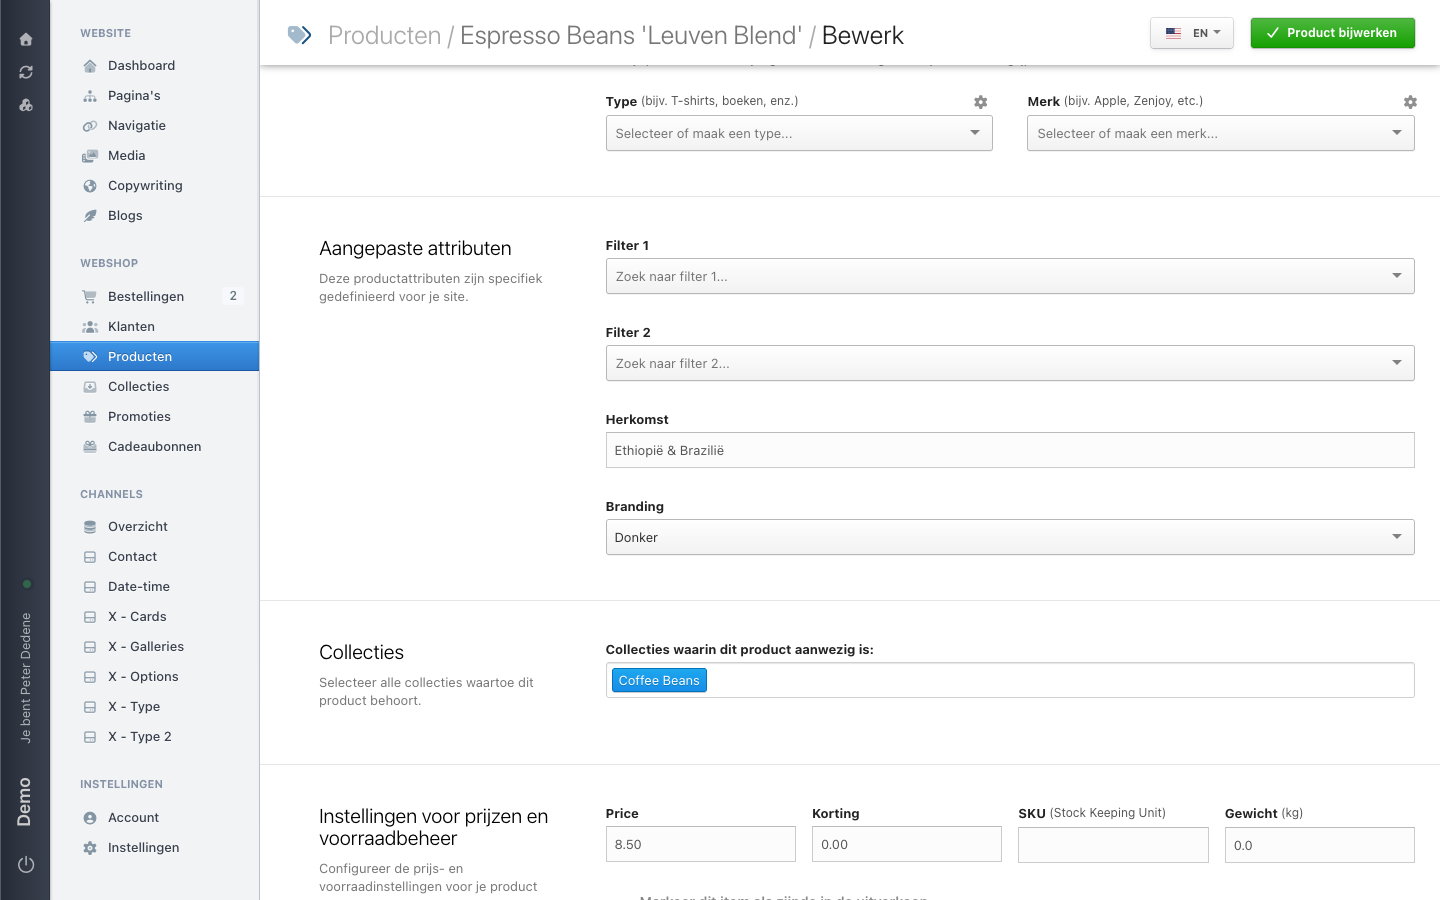
On the product form, your own fields appear in the Aangepaste attributen (custom attributes) section. A select field becomes a picker holding the options you set.
 View full size
Fill in the value of a select field through this form. In our testing it was not writable through the API.
Excluding fields from search
Under the search options you can list fields to exclude from search. Use it for content that muddies results, such as internal codes or a technical json field. Leave it empty and Nimbu indexes every field.
Customers have the same data model, with the same field types. See Add custom customer fields.